Working with Some Virtualization Techniques on macOS
After officially leaving my lab on campus, I no longer have machines under my control that I can configure freely, except for my laptop, an Intel-based MacBook. To continue working and studying with Linux, I decided to create a Linux VM on my laptop.
It is kind of ashamed that I haven’t got understand of macOS carefully; I usually work on remote servers with Linux systems. My macbooks are used highly depending on applications with fancy UIs, which means I don’t know where the system/control-plane packages are located and how they got run on my laptop. Through this project, it is a good chance to get know the software stack.
Existing Softwares
There are several free virtualization tools/methods available for macOS:
| Virtualization tools for macOS | Vendor | Special notes |
|---|---|---|
| UTM | Open Source | Use QEMU by default |
| xhyve | Open Source | Design based on bhyve in FreeBSD |
| LinuxKit | Open Source / Docker | Previously used by Docker for Mac with HyperKit1 |
| VirtualBox | Oracle | |
| VMware Fusion | VMware (Broadcom) | The Pro version becomes free for personal usage |
| Tart | Cirrus Labs | Exclusively for Apple silicon Macs |
Some interesting gossip of the naming
As a systems researcher, I love the moment when I get to name a system for a paper 😆. So, whenever I see a new technology, I can’t help but wonder why it was named that way. Here are some thoughts for the mentioned ones:
About UTM: I tried searching for what this name stands for but couldn’t find a definitive answer. Some say it might be “Universal Turing Machine”, the one everyone knows.
About xhyve: I have no idea how to pronounce this, but in my head, I say it as
/ɛks-haɪv/.About LinuxKit: The control-plane tools/functions in macOS have names ending in “-Kit” (in upper camel case). Even so LinuxKit is open-source, it tries to hide itself among the tools?
Among these, the only one I’ve worked with before is VirtualBox. Therefore, this post will focus on the rest of the four tools (sorry no Tart as well, due to my hardware limitations).
Technology Behind
As we know, macOS is a Unix-like OS, it doesn’t use our familiar Linux virtualization backend softwares like KVM or Xen. They are the hypervisors, or called VMMs (virtual machine monitors).
The macOS have two main frameworks for running VMs:
Hypervisor and
Virtualization
(BTW, these control-plane frameworks are located under /System/Library/Frameworks/).
Their names can be a bit misleading, but they actually work together2.
Hypervisor.framework handles vCPU management and Memory mapping for VMs, while
Virtualization.framework offers high-level APIs for creating and managing them.
Virtualization tools can be built on top of these native frameworks.
In fact, tools like UTM, xhyve, and LinuxKit are all built with them.
It’s also likely that others, VirtualBox and VMware Fusion, are implemented using these libraries too (because, why wouldn’t they?).
Then, what’s the difference between them when it comes to choosing the one most suitable for my needs?
Here are some conditions I would consider:
- UI friendliness: Having a clear, easy-to-configure interface.
- VM customizability: I might need the ability to modify hardware settings.
- Efficiency: Lower resource usage and faster setup time are better for sure.
Below, let’s deep dive into the other technologies and design ideas behind these tools.
The standing point of xhyve + LinuxKit
Among the four softwares, UTM and VMware Fusion are comprehensive applications
with user-friendly UIs, we can boot a VM directly with them.
On the other hand, xhyve and LinuxKit are simply libraries and command-line tools.
More specifically, xhyve acts as the hypervisor,
while LinuxKit provides an interface to configure VM settings.
They can work together, as shown in this tutorial (LinuxKit do require a hypervisor to run).
So, why would anyone use these tools instead of the more full-featured ones?
One reason is that different implementations can solve different problems.
For example, if you need minimal resource usage and want to automate operations,
like how Docker for Mac used to “secretly” run a Linux backend,
this lightweight approach works well.
That said, xhyve now seems unmaintained: its last commit on Github was over 4 years ago, it’s no longer on LinuxKit’s supported list and Homebrew. Still, just for fun and curiosity, I decided to try it out using the latest available codebase.
QEMU: the hosted hypervisor
QEMU (Quick EMUlator) is a general-purpose and widely used hardware emulation solution on Linux. It can also function as a hypervisor, since it is capable of mimicking hardware behavior: allowing guest OSes to run on its emulated devices and processes. There are several types of hypervisors, and the main difference lies in how dedicated your machine is to running VMs. Like, whether you can still multitask on the host OS while VMs are running. When QEMU acts as a hypervisor, it’s considered a loosely dedicated one. As an emulator, it doesn’t take over the whole system. On Linux, one common setup is using QEMU alongside KVM: with KVM acting as the main hypervisor and QEMU providing hardware emulation support. I actually used this combination 10 years ago (OMG) when running HPC workloads on a VM cluster. Some optimizations required QEMU to work with Virtio to virtualize specific devices like InfiniBand and GPUs.
Emulator vs. Simulator
As a non-native English speaker, I often find it hard to distinguish between emulator/emulation and simulator/simulation, since my native language tends to use the same or very similar words for both.
To explain the difference: for a certain object or situation, an emulator/emulation creates an identical or highly faithful version of the target system, allowing other software to run on it just as if it were the real thing. For example, a Game Boy Advance emulator lets us play Pokemon games on a PC without needing the actual Game Boy device. In contrast, a simulator/simulation builds a theoretical model of how the target system behaves, usually to study or predict its behavior. Examples include simulating weather patterns, traffic flow, or earthquakes for forecasting or disaster prevention, as well as flight or surgical simulations for training purposes.
Blockers During Installation
To make my experience and study more reproducible for others, let me first share a brief summary of my working environment:
- Hardware/OS: MacBook Pro 2019 (4-core Intel i5 CPU + 16GB RAM), macOS Sequoia 15.3.1
- Software (latest stable versions as of writing):
- UTM - 4.6.4
- xhyve - Github repo master branch
- LinuxKit - 1.0.1
- VMware Fusion - 13.6.3
- VM OS: Ubuntu 24.04
After installing the platforms, UTM and VMware Fusion each take up more than 1 GB of disk space, which was a bit surprising – especially compared to Oracle VirtualBox (v7.1.6), which uses less than 300 MB. As expected, LinuxKit is more lightweight, taking up only about 60 MB.
I won’t go into step-by-step installation instructions for the platforms or VMs, as I assume readers of this post can configure them easily. Instead, I’ll focus on things that are worth noting. Even before running a VM, I encountered a few unexpected issues just trying to set up the virtualization tools. Some tools, like xhyve, didn’t even make it past the installation phase, forcing me to adjust my study plan.
VMware Fusion got hidden behind a maze of clicks
I used to think downloading a .dmg file would be the simplest task — just one click and done.
However, not for VMware Fusion.
To get the installer, we first need to register for the Broadcom support protal,
and then go through a series of not-so-obvious steps. The UI is quite rough…
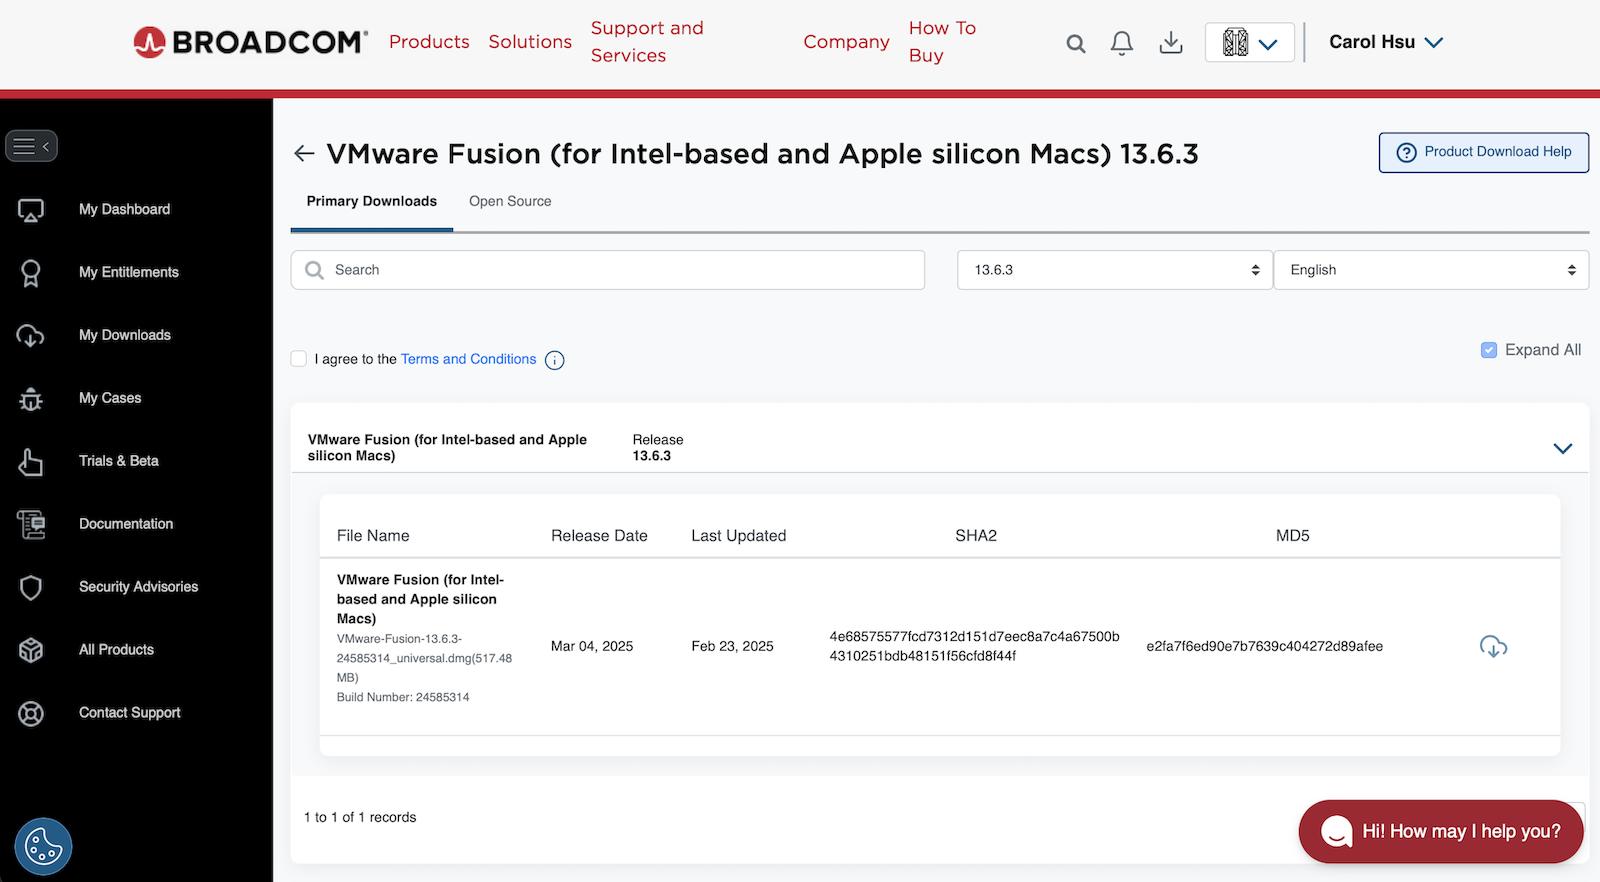
To save you some frustration, here's a quick guide to get to the download
- Go to the “My Downloads” section on the left panel.
- Find the info box that says “Free Software Downloads available HERE” — click on the “HERE” link.
- Use the search bar to look for VMware Fusion, or filter by division and keep checking next page until it shows up.
- Click on the product name, twice.
- Choose the release version you want.
- Check the box of terms and conditions for agreement.
- Finally, click the cloud icon to start the download.
Now, we’re ready to install it 😮💨
Trying to build xhyve but failing
As mentioned earlier, xhyve is no longer maintained and has been removed from the Homebrew repository. So, I tried building it from source using Xcode. That was already a hassle: I’d never used Xcode to manage my environment before, and now I had to reinstall it following xhyve’s official instructions (Xcode then costs me 5 GB of disk space). After going through several rounds of trial and error, updating library paths, accepting license agreements, installing dependencies, the build still has compiling errors. In the end, I decided to give up and focus my time on what really matters on this post.
Booting Up the VMs
Installing a VM is straightforward with UTM and VMware Fusion – just use an ISO image and follow the familiar OS installation steps. LinuxKit, however, works differently. It requires you to build a VM image first, then run it with a chosen hypervisor. To build the image, you need a configuration file in YAML, as outlined in this document. The result is a Linux-based VM composed of multiple containers defined in the YAML file. Interestingly, all components, including the Linux kernel, are packaged as Docker images. These images must be downloaded locally and may need to be extracted during the build phase. At first, using container images for VM provisioning felt like a workaround, but on second thought, it might be a clever and efficient design choice from a system perspective.
Booting from an existing VM image
Even though I don’t really need to reinstall VMs or move images around,
I still tested how each platform handles the installation with existing VM images.
It’s important to understand how VM states are saved, exported, and restored.
VMware Fusion uses the OVF format. But before exporting, you have to take a snapshot.
In contrast, UTM lets you export a live VM directly but in its own .utm format.
It’s also worth understanding image formats and their configuration dependencies.
For example, kernel images and initrd files, or, booting with BIOS vs. UEFI.
These details can affect whether a VM boots properly.
There is one frustrating issue: when I tried to reuse a kernel image to launch a new VM in UTM,
I got a QEMU error about overlapping bootindex values.
It made sense, but I had to dig around just to figure out how to modify that parameter – another small rabbit hole.
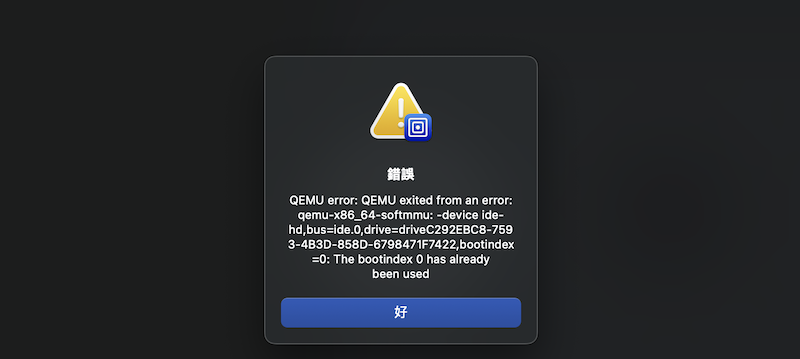
In UTM, booting a VM with a custom kernel image requires updating the "bootindex" parameter manually.
Customizability vs. Simplicity
Although VMware Fusion offers a cleaner, more modern UI than VirtualBox or UTM, when it comes to VM configuration, the process isn’t exactly intuitive. For example, if you want to create a VM with custom settings, Fusion gives you just a few screens before jumping into OS installation. Resource allocation is preselected and fixed based on the OS type.
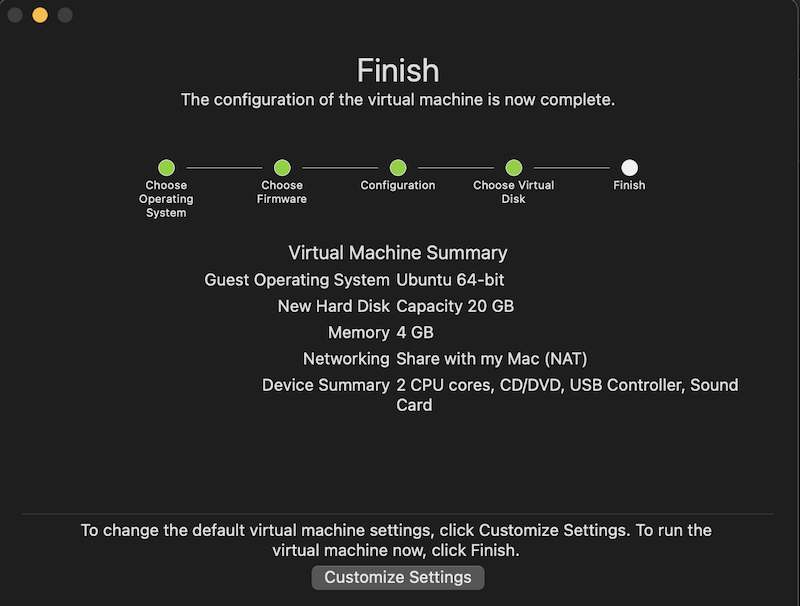
VMware Fusion's default settings for a 64-bit Ubuntu VM. Most options are locked. "Customize Settings" button is only for changing the name of VM.
With its UI flow, we couldn’t immediately change those values at beginning. It is required to fully shut down the VM (not just suspend it), and then go back into settings to adjust the resources. Sure, Fusion probably intends to save users time by recommending defaults. But that approach causes two issues: VM newbies might unknowingly waste resources (Windows 11 VM is asked for 64 GB disk space!), and the experienced users waste time hunting down basic configuration options. Say what you will about VirtualBox: it may be old-school, but I still prefer its directness. It lets you configure everything upfront without hidden steps.
Side Note
Before my evaluation on this topic, I expected that I would probably continue using VirtualBox or switch to VMware Fusion, since they are more comprehensive solutions. In the end, what I want is just a Linux machine.
I’ve been busy with some relocation tasks over the past month, hoping to have more time for writing sooner!
Docker on MacOS is slow and how to fix it, posted by Paolo Mainardi in CNCF. ↩︎
Virtualization question answered by Apple engineer. ↩︎
Author Carol Hsu
LastMod 2025-07-02 (c35e81a)
License All rights reserved. Feel free to reach out with any questions.